


Table of Contents
- DIY Magnetic Wall vs Professional: The Core Differences
- Magnetic Paint vs Magnetic Sheets: Understanding Your Options
- Magnetic Wall Installation Cost: DIY and Professional Pricing
- DIY Installation: Step-by-Step Process and What You'll Need
- Best Magnetic Wall Paint UK: Performance and Durability Comparison
- Durability and Long-Term Maintenance: Which Method Lasts Longer
- DIY vs Professional: Pros, Cons, and When to Choose Each
- Frequently Asked Questions
Last Updated: August 8, 2026
DIY Magnetic Wall vs Professional: The Core Differences
The choice between a DIY magnetic wall and professional installation hinges on three factors: budget, timeline, and the magnetic strength you need. A DIY approach using magnetic paint costs significantly less upfront but demands multiple coats and careful surface preparation. Professional installation with magnetic wallcovering delivers consistent results faster, though at a higher material and labour cost.
Understanding these differences matters because magnetic walls aren't just aesthetic upgrades, they're functional surfaces that need to hold weight reliably. A poorly applied magnetic paint that won't grip magnets properly defeats the purpose entirely. Conversely, paying for professional installation when a DIY solution would work fine wastes money you could spend elsewhere.
This guide from MagScapes covers both approaches in detail, helping you weigh the trade-offs and decide which method suits your space, budget, and tolerance for hands-on work.
Magnetic Paint vs Magnetic Sheets: Understanding Your Options
The fundamental difference between magnetic paint and magnetic wallcovering comes down to how the ferrous particles are delivered to your wall. Magnetic paint is a water-based coating containing magnetite particles that you apply with a roller, similar to standard emulsion. Magnetic sheets, or magnetic wallcovering, are pre-manufactured rolls with a ferrous layer bonded to a backing, applied like traditional wallpaper.
Magnetic paint requires multiple coats (typically 2-3 heavy applications) to build sufficient ferrous particle density for reliable magnet pull. Each coat must be rolled on evenly, dried, and sanded between applications. The process is labour-intensive and messy, particularly the sanding stage.
Magnetic wallcovering like MagScapes' offerings arrives ready-to-install with consistent magnetic strength already engineered into the material. The ferrous receptive surface is sealed and protected, meaning the magnetic pull remains stable over years of use. Installation is faster, typically completed in a single day for most rooms, and doesn't require the multi-coat build-up or sanding.
Magnetic Wall Installation Cost: DIY and Professional Pricing
Cost comparisons depend heavily on wall area and whether you're comparing DIY paint with professional wallcovering installation or DIY paint with professional paint application.
For a typical home office (approximately 12 square metres of wall space), magnetic paint costs roughly £180-£250 in materials alone. You'll need primer, 2-3 coats of magnetic paint, finish paint or wallpaper to cover it, sanding materials, and application tools. Labour, your own time, is free, but expect 15-20 hours of work spread across several days to allow for drying between coats.
Professional magnetic wallcovering installation for the same 12 square metres runs £2,000-£3,500 in total project cost, including materials and skilled installation labour. MagScapes' premium wallcovering products like MagWrite™ and MagPaintable™ begin at £216 per roll, with each roll covering approximately 50 square metres. For smaller spaces or rental properties, this per-project cost feels steep. For offices, classrooms, or healthcare environments where durability and consistent performance matter, the investment often justifies itself through years of reliable use.
The cost-per-square-metre calculation shifts the perspective:
- DIY magnetic paint: approximately £15-£20 per square metre (materials only)
- Professional magnetic wallcovering: approximately £65-£95 per square metre (materials plus installation)
However, this doesn't account for failure risk. A poorly applied magnetic paint that won't hold magnets reliably has wasted both money and time. Professional installation carries a warranty and guarantee of performance.
DIY Installation: Step-by-Step Process and What You'll Need
Surface Preparation
Before any magnetic paint touches your wall, proper preparation determines success or failure. Start by clearing the wall completely, remove furniture, artwork, and fixtures. Fill any holes or gaps with spackling compound and sand smooth once dry. Existing paint must be clean, dry, and in good condition. If the wall is glossy, lightly sand it with 120-grit sandpaper to improve primer adhesion.
Wipe the entire surface with a damp cloth to remove dust, then allow it to dry completely. Moisture trapped under primer causes adhesion failure and bubbling.
Apply a quality primer designed for the wall substrate. If you're working on bare drywall, use a drywall primer. On existing painted surfaces, a general-purpose primer works. Allow the primer to dry fully according to manufacturer instructions, typically 2-4 hours.
Application Techniques
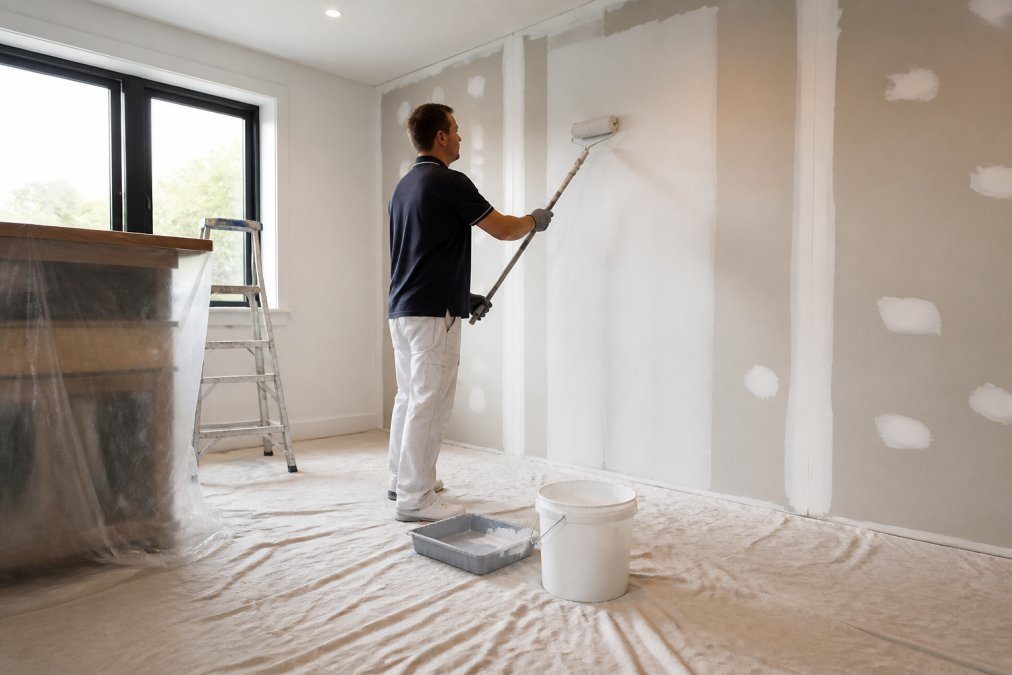
Magnetic paint must be applied in heavy, even coats using a high-quality roller. Thin coats won't provide adequate ferrous particle density for reliable magnet pull. Use a medium-pile roller (around 9-12mm nap) for smooth drywall; thicker naps are unnecessary and waste paint.
Pour magnetic paint into a roller tray and load the roller thoroughly. Apply the first coat in overlapping vertical strokes, working from top to bottom. Don't worry about complete coverage on the first coat, focus on even distribution. Allow the first coat to dry completely (typically 24 hours, though check the product label).
Sand the dried first coat lightly with 150-grit sandpaper to promote adhesion for the second coat. Wipe away dust with a damp cloth. Apply the second coat using the same technique as the first. For most applications, a second coat provides adequate magnetic strength. Test with a magnet before proceeding to a third coat, if a standard fridge magnet holds securely, you've achieved sufficient coverage.
A third coat is often necessary for heavy-duty use environments like classrooms or healthcare settings where magnets will be placed and removed constantly. Apply it using the same process: dry, light sand, dust removal, then application.
Once the final magnetic coat is dry, you can paint over it with standard emulsion in any colour. The ferrous particles remain active beneath the finish paint, so long as the topcoat isn't excessively thick.
Drying and Curing
Magnetic paint drying times vary by product, but most require 24 hours between coats and 48 hours before magnets can be reliably placed. Humidity and temperature affect drying, cold, damp conditions extend drying times significantly. Ensure adequate ventilation during application and drying; open windows and use fans to circulate air.
The wall is fully cured and ready for heavy use after approximately one week. During this curing period, avoid touching the surface or placing magnets on it, even if it feels dry to the touch.
Best Magnetic Wall Paint UK: Performance and Durability Comparison
Smarter Surfaces Magnetic Paint is the most widely available magnetic paint product in the UK market. It's water-based, solvent-free, and exceeds UK standards for eco-friendliness. The paint holds approximately 4 A4 sheets with a single magnet after proper application. Coverage is typically 3 square metres per litre, requiring 2-3 litres for a 12 square metre room.
ThistlePro Magnetic Plaster from British Gypsum offers an alternative approach, a specialist finishing plaster rather than paint. It's mixed with water to activate magnetic properties, then applied as an undercoat before decoration. This method integrates the magnetic function directly into the wall structure, creating an invisible magnetic surface once painted or wallpapered. However, ThistlePro requires professional application due to its plaster-based nature and is typically more expensive than paint for DIY projects.
For superior performance and durability, magnetic wallcovering products like MagScapes' MagWrite™ and MagPaintable™ outperform paint significantly. These pre-manufactured rolls deliver consistent ferrous particle density and sealed protective layers that resist humidity, scuffing, and wear. MagWrite™ offers a gloss white dry-erase surface suitable for offices and classrooms. MagPaintable™ arrives in matt white, allowing you to paint it any colour while maintaining magnetic function.
The performance difference is measurable: magnetic paint typically holds lightweight items reliably but struggles with heavier objects or frequent placement and removal cycles. Magnetic wallcovering handles heavy use environments without degradation, making it the preferred choice for schools, hospitals, and busy offices.
Durability and Long-Term Maintenance: Which Method Lasts Longer
Magnetic paint degrades over time, particularly in high-humidity environments like kitchens or bathrooms. The ferrous particles can oxidise, reducing magnetic pull strength. Scuffing and wear expose the underlying paint layers. Minor damage, a small dent or scratch, is difficult to repair without repainting the entire wall.
Properly applied magnetic paint typically maintains reliable performance for 5-7 years in normal residential use. In commercial or educational environments with heavy daily use, performance may decline faster.
Magnetic wallcovering, by contrast, is engineered for longevity. The ferrous layer is sealed and protected, resisting humidity, oxidation, and surface wear. Scuffs and minor damage can often be cleaned or touched up without affecting the underlying magnetic function. Most quality magnetic wallcovering products maintain consistent performance for 10+ years, even in demanding environments.
MagScapes' wallcovering products are designed to resist humidity effects through their sealed ferrous layer, making them suitable for healthcare environments where moisture and frequent cleaning are standard. The durable finish resists staining and fading, maintaining wall aesthetics alongside magnetic function.
Long-term maintenance differs significantly between the two methods. Magnetic paint requires monitoring for oxidation and potential reapplication of topcoat paint if it becomes worn. Magnetic wallcovering requires only regular cleaning with appropriate products, no repainting or special maintenance.
DIY vs Professional: Pros, Cons, and When to Choose Each
DIY Magnetic Paint Installation
Pros:
- Lowest material cost (£15-£20 per square metre)
- Complete control over timing and execution
- Suitable for small spaces or test installations
- No dependency on contractor availability
Cons:
- Requires 15-20 hours of labour for a typical room
- High risk of uneven coverage or insufficient coats
- Multi-day project with drying time between coats
- Sanding between coats is dusty and labour-intensive
- Difficult to repair or touch up if coverage is poor
- Lower durability than professional wallcovering
- Magnet pull may be unreliable if application is suboptimal
Best for: Homeowners with time and patience, rental properties where permanence isn't required, small accent walls or test areas, budget-conscious projects where durability is secondary.
Professional Magnetic Wallcovering Installation
Pros:
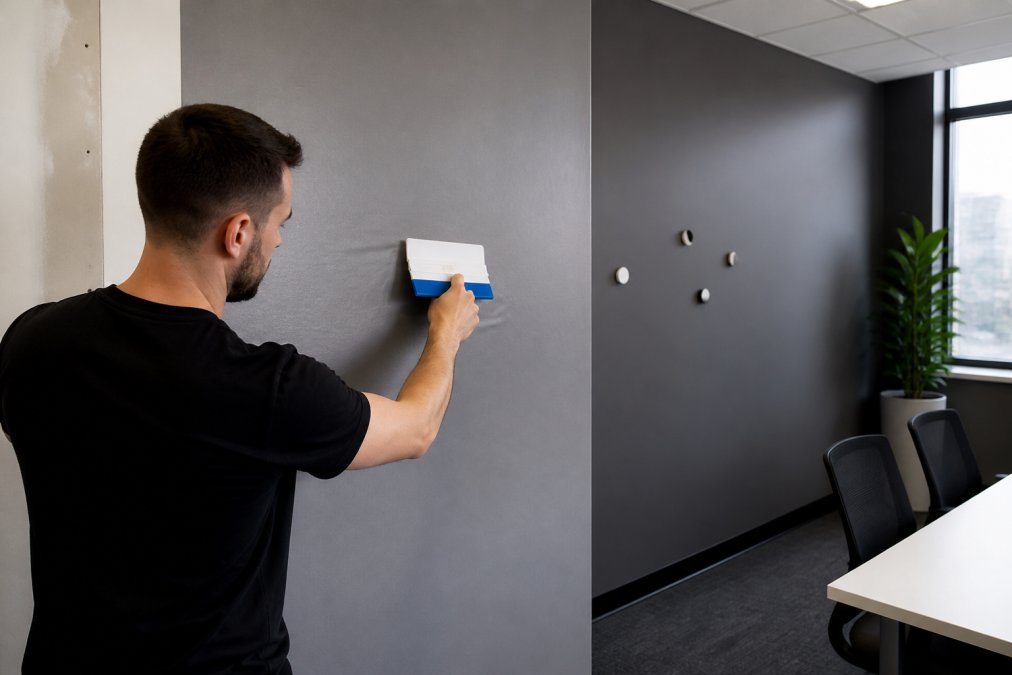
- Consistent, reliable magnetic performance guaranteed
- Installation completed in 1-2 days
- No multi-coat drying cycles or sanding
- Superior durability (10+ years typical lifespan)
- Professional finish with no visible seams or imperfections
- Sealed ferrous layer resists humidity and wear
- Easier to maintain and repair
- Suitable for demanding environments (schools, hospitals, offices)
Cons:
- Higher upfront cost (£65-£95 per square metre)
- Dependency on contractor scheduling
- Not ideal for frequent wall changes
- Requires skilled installation for optimal results
Best for: Permanent installations, commercial spaces, healthcare environments, educational facilities, homeowners prioritising durability and performance over cost, spaces where magnet pull reliability is critical.
Decision Framework
Choose DIY magnetic paint if:
- Your budget is under £300 for the project
- The installation is temporary or in a rental property
- You have 15-20 hours available across several weeks
- You're comfortable with potential uneven results
- The wall is small (under 10 square metres)
- You're testing whether a magnetic wall suits your needs
Choose professional magnetic wallcovering if:
- The installation is permanent or in a property you own
- The space is commercial, educational, or healthcare
- You need reliable magnet pull for daily use
- Durability matters more than upfront cost
- You want the installation completed quickly
- The wall is large (over 15 square metres)
- Professional aesthetics are important
For corporate offices or educational institutions, the decision is clearer: professional installation with quality magnetic wallcovering delivers better value over the product lifespan. MagScapes' solutions are specifically designed for these environments, offering integrated writable surfaces and consistent performance that DIY paint cannot match.
For homeowners in permanent residences, professional installation justifies itself through 10+ years of reliable use without degradation. For rental properties or temporary installations, DIY magnetic paint is the pragmatic choice despite its limitations.
Choosing between DIY and professional magnetic walls depends on your timeline, budget, and how critical reliable magnet pull is to your space. DIY magnetic paint offers affordability but demands your time and carries performance risk. Professional magnetic wallcovering costs more upfront but delivers durability, consistent results, and minimal maintenance over a decade of use.
If you're outfitting a permanent space, whether a home office, classroom, or healthcare facility, professional installation with MagScapes' magnetic wallcovering products provides the performance and longevity that justify the investment. Start by exploring MagScapes' range of ferrous wallcoverings, including MagWrite™ for dry-erase surfaces and MagPaintable™ for custom colour finishes. Get in touch with our team to discuss your project requirements and receive a detailed cost estimate tailored to your space.
Frequently Asked Questions
Can you make your own magnetic wall, or is professional installation necessary?
You can create a magnetic wall yourself using magnetic paint or ferrous wallcovering, though both require careful preparation and technique. Magnetic paint demands multiple coats (typically 2-3) and thorough sanding between applications. Ferrous wallcovering requires precision in measuring, cutting, and alignment. Professional installers ensure consistent magnetic field strength and a flawless finish, particularly important for large areas or high-traffic spaces like offices and classrooms. For rental properties or smaller projects, DIY is feasible; for commercial installations, professional application delivers superior, long-lasting results.
What is the cost difference between DIY magnetic paint and professional magnetic wall installation?
DIY magnetic paint costs significantly less upfront, around £61 per 3m² coverage for quality products like Smarter Surfaces. However, you'll need 2-3 coats, plus primer, sanding materials, and tools, pushing total costs to £200-400 for a typical bedroom wall. Professional magnetic wallcovering installation runs higher in material costs (approximately £3,100 for 50m²) but includes expert labour, guaranteeing durability and consistent magnetic strength. For rental spaces or temporary solutions, DIY paint is economical; for permanent installations in offices or schools, professional wallcovering offers better long-term value despite higher initial investment.
How durable are DIY magnetic walls compared to professional installations?
Professional magnetic wallcoverings like MagScapes products demonstrate superior durability, maintaining consistent magnetic pull strength over years of heavy use in classrooms and offices. DIY magnetic paint can lose adhesion and magnetic performance over time, especially in high-humidity areas or where walls experience frequent contact. Professional installations resist scuffing, staining, and moisture better due to sealed ferrous layers and proper substrate preparation. For spaces with heavy daily use, healthcare facilities, busy classrooms, or active playrooms, professional installation justifies the cost. DIY paint works adequately for lighter-use areas but typically requires touch-ups or reapplication within 2-3 years.
What tools and materials do I need for a DIY magnetic wall project?
For magnetic paint DIY, you'll need: magnetic primer, magnetic paint (2-3 litres minimum), paint roller with extension pole, drop cloth, sandpaper (120-150 grit), sanding block, paintbrush for edges, measuring tape, and safety equipment (dust mask, gloves). For ferrous wallcovering, add a smoothing tool, utility knife, straight edge, and adhesive (if not pre-pasted). Quality matters, cheap rollers shed fibres into paint, affecting magnetic strength. Budget £150-300 for tools and materials for a standard bedroom. Professional-grade equipment costs more but delivers better surface coverage and magnetic field consistency, reducing the need for multiple coats.
Will magnetic walls interfere with medical equipment or Wi-Fi in offices and hospitals?
Modern magnetic walls using ferrous particles or ferrous wallcovering generate localised magnetic fields insufficient to interfere with Wi-Fi, routers, or sensitive medical equipment like monitors or diagnostic devices. The magnetic pull is designed for lightweight items (magnets, metal office supplies) and dissipates quickly beyond a few centimetres from the wall surface. Healthcare facilities worldwide use magnetic wallcoverings for visual communication boards without equipment conflicts. However, if your space contains specialised equipment (MRI machines, sensitive electronics), consult your facilities team before installation. Professional installers familiar with healthcare environments can advise on placement and confirm compatibility with your specific equipment.
This article was written using GrandRanker