


Table of Contents
- Magnetic Wallcovering Surface Preparation: The Step Beginners Skip
- Magnetic Wallpaper Installation Tools You Actually Need
- Measuring, Cutting and Planning Your First Drop
- Applying Adhesive and Hanging the First Drop
- Smoothing, Seams and Jointing for a Professional Finish
- Troubleshooting Magnetic Wallcovering Bubbles and Lifting Edges
- Testing Magnet Strength, Layering and Removing It Later
- Frequently Asked Questions
Last Updated: September 15, 2026
Magnetic Wallcovering Surface Preparation: The Step Beginners Skip
Magnetic wallcovering is a ferrous-backed wall finish that turns an ordinary wall into a surface that holds magnets, notes and whiteboard markers. At MagScapes, we manufacture magnet-receptive wallcoverings for offices, classrooms, hospitals and homes, and we've watched first-time installers fail at exactly one stage more than any other: preparation.
Here's the uncomfortable truth. The wall itself decides whether your installation lasts. Adhesive bonding depends on a sound, clean, sealed substrate, and no amount of careful hanging technique rescues a dusty or flaking surface.
Work through this before you open a single roll:
- Strip old wallpaper and remove flaking paint with a putty knife
- Fill cracks and dents, then sand flush with fine grit sandpaper
- Wash the wall to remove grease and grime, then let it dry fully
- Prime bare plaster or plasterboard with a drywall primer
- Check for damp, and stop if you find any
A common mistake is skipping the primer because the wall "looks fine". Porous plaster drinks adhesive unevenly, and you get dry patches that lift within weeks. The British Standard guidance on wallcoverings and wall preparation treats substrate condition as a specification matter, not a cosmetic one, and that framing is worth borrowing.
Magnetic Wallpaper Installation Tools You Actually Need
You need less than the average tutorial suggests, but the tools you do buy have to be the right ones. A pasting brush, a seam roller, a smoothing tool, a spirit level, a tape measure, a sharp trimming knife and the correct adhesive will carry a beginner through a full wall.
The short list, and what each one actually does
- Pasting brush, a 100mm to 150mm brush for laying paste onto the wall in even vertical strokes. A roller works on large flat runs but pushes paste into corners unevenly.
- Smoothing tool, a felt or nylon-bladed squeegee. The felt edge glides over the ferrous face without scratching it; a metal edge will score the surface.
- Seam roller, a small, hard rubber roller run along each joint to seat the edges. Do not use it to flatten bubbles; it stretches the material.
- Spirit level, 1.2m is the practical minimum. Anything shorter and your vertical line drifts over a full wall height.
- Trimming knife, a snap-off blade knife. Change the blade every drop or two; a blunt blade tears the ferrous layer rather than cutting it.
- Tape measure and pencil, mark the back of the drop, never the face.
Adhesive choice is surface-dependent, not preference-dependent
This is the point most guides skip. Absorbent plaster and plasterboard take a starch-based paste (bsigroup.com). Sealed, painted or non-absorbent surfaces such as MDF, gloss-painted plasterboard or sealed plywood need a vinyl-on-vinyl acrylic instead. Buying the wrong one is the single most common cause of edges lifting within days.
| Surface | Adhesive type | Why |
|---|---|---|
| Bare or primed plaster, plasterboard | Starch-based paste | The wall drinks the paste and the ferrous backing keys into it |
| Gloss paint, silk vinyl, sealed MDF | Vinyl-on-vinyl acrylic | Bonds to a non-absorbent face where starch paste cannot grip |
| Previously papered wall (stripped and primed) | Starch-based paste | Treat as bare plaster once the old paste residue is washed off |
For absorbent walls, MagFix Wallcovering General Adhesive is a ready-mixed starch paste at £22.00 with high wet tack, which means the drop slides into position and then stays put. For painted or sealed walls, MagVOV Wallcovering Adhesive at £33.00 is the acrylic equivalent.


How much adhesive you actually need
A common beginner error is under-pasting the edges because the middle of the drop looks well covered. Paste coverage should be even across the whole drop, with a little extra worked into the last 50mm at each edge and at the top and bottom overhangs. If you can see the wall through the paste, you have not applied enough.
What you do not need
You do not need a wallpaper steamer, a plumb bob (a spirit level does the same job), or a specialist trimming guide. You also do not need to paste the wallcovering itself, ferrous-backed material is pasted at the wall, not the paper, and pasting the back will make it heavy and difficult to position.
Not sure which material suits your wall? The MagScapes Samples Pack at £12.50 lets you test magnet performance, cleaning and colour on your actual surface before committing.

Measuring, Cutting and Planning Your First Drop
Measure the wall height at three points and cut to the tallest, adding 50mm top and bottom for trimming. Vertical alignment matters more than measurement accuracy here, because a drop that's 5mm out at the ceiling will be visibly crooked by the skirting.
Plan the drop sequence before you cut anything:
| Step | Action | Why it matters |
|---|---|---|
| 1 | Mark a true vertical line with a spirit level | Every later drop follows this line |
| 2 | Cut the first drop with 50mm overhang | Allows trimming after smoothing |
| 3 | Number the drops on the back | Prevents mismatched pattern alignment |
| 4 | Check wall texture for high spots | Prevents bubbles before they form |
Cut on a clean dust sheet, not the floor. Grit on the back of a ferrous wallcovering will telegraph through the surface once it's pressed down.
Applying Adhesive and Hanging the First Drop
Apply adhesive to the wall, not the wallcovering, using a pasting brush in even vertical strokes. Work in sections roughly one drop wide so the paste stays wet while you position the material.
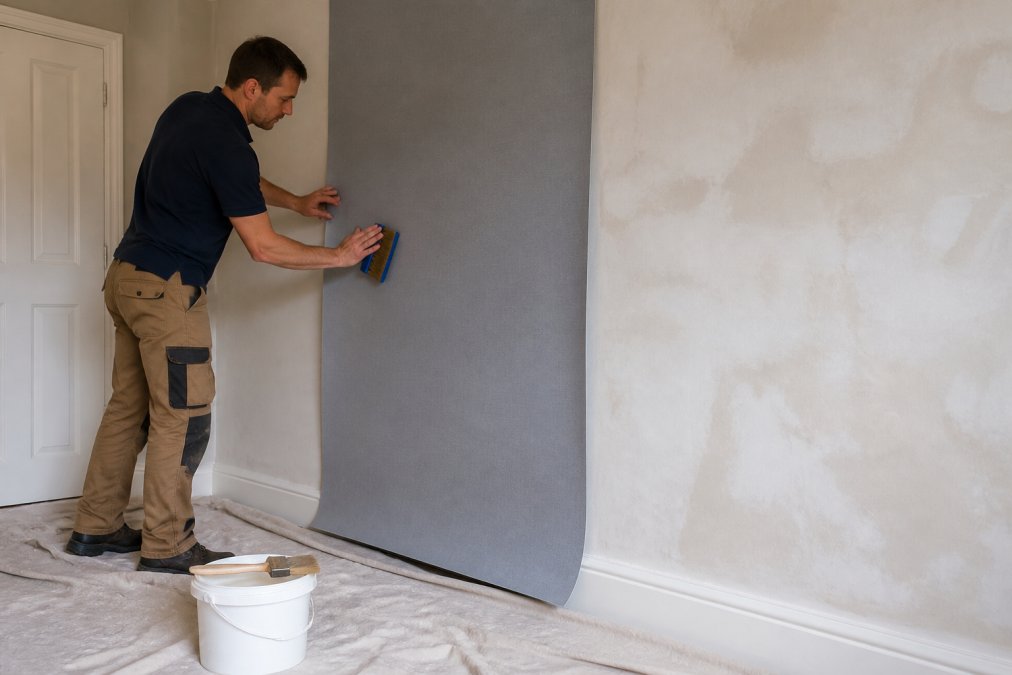
Press the top edge into your vertical guide line, allowing the 50mm overhang above. Work downward with the smoothing tool in overlapping strokes from the centre outward. The wet tack in a quality adhesive gives you a few minutes to slide the drop into true alignment before it grabs.
Smoothing, Seams and Jointing for a Professional Finish
Smooth from the centre of each drop outward and downward, chasing air bubbles ahead of the tool rather than pressing down on them. A seam roller run along each joint after smoothing seats the edges without stretching the material.
Butt joints versus overlap joints on ferrous wallcovering
Two joint types matter, and the ferrous backing changes the calculus slightly compared with ordinary wallpaper.
- Butt joint, edges meet without overlap. This gives the cleanest professional finish on ferrous wallcoverings and is what you should aim for. The ferrous layer is rigid enough that a well-seated butt joint stays flat, but it will not forgive a drop that is out of vertical by more than a couple of millimetres.
- Overlap joint, one edge laps over the next. More forgiving for beginners, but it leaves a visible ridge that shows under raking light, and the overlap can interfere with magnet contact right at the seam.
Seam technique step by step
Trimming the overhangs
Why seams fail on magnetic wallcovering
Troubleshooting Magnetic Wallcovering Bubbles and Lifting Edges
Testing Magnet Strength, Layering and Removing It Later
Frequently Asked Questions
What surface preparation is required for magnetic wallcoverings?
Walls need to be sound, clean and dry before you start. Fill any holes with filler, sand back with fine grit sandpaper, then wipe the wall down to remove dust and grease. Absorbent surfaces such as plaster and plasterboard should be sealed with a primer so the adhesive bonds evenly. If the wall is painted, check that the paint is well bonded, because loose or flaking paint will pull away under the weight of the wallcovering.
Can I install magnetic wallpaper over existing paint?
Yes, provided the paint is firmly adhered and not chalky or peeling. Painted walls are non-absorbent, so you need an adhesive formulated for sealed surfaces rather than a standard paste. MagVOV Wallcovering Adhesive is made for painted walls, MDF and similar substrates, while MagFix suits plaster and plasterboard. Test a small patch first to confirm the paint holds, and clean the surface to remove grease before hanging.
Do I need special adhesive for magnetic wallcoverings?
Standard wallpaper paste will not hold a ferrous wallcovering reliably, so use an adhesive matched to your wall type. MagFix Wallcovering General Adhesive (£22.00) works on absorbent surfaces like plaster and plasterboard, and MagVOV Wallcovering Adhesive (£33.00) is designed for sealed or non-absorbent walls such as painted plaster, MDF and plywood. Both are ready mixed, so you can roll or brush them straight onto the wall.
How do I ensure a smooth finish when hanging magnetic wallcoverings?
Work from the centre of each drop outwards with a smoothing brush or plastic scraper, pushing air ahead of you rather than trapping it. Press seams down with a seam roller, but keep the pressure light so you do not stretch the material. If a bubble appears, lift the edge back to the bubble and re-lay that section rather than puncturing it. A sample pack (£12.50) lets you practise smoothing and trimming on a small piece before committing to a full wall.